|
|
RUDEL'S REVENGE Meeting Engagement:
Germany vs USSR
Malaya Viska, Jan.10th, 1944
Turns: 15
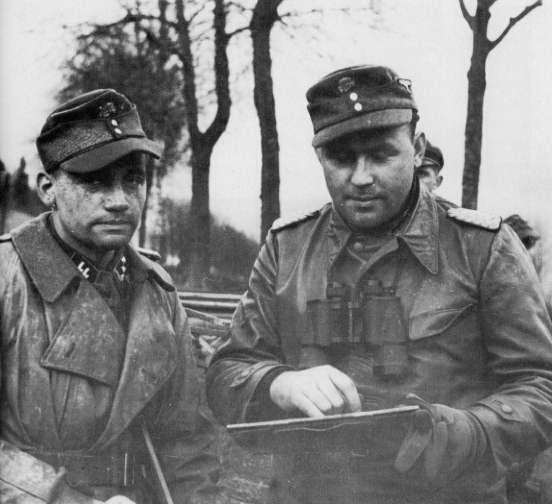
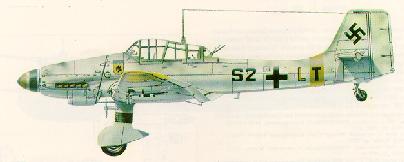
Scenario Design: Wild Bill Wilder Throughout the end of 1943, the Russians continued to hammer at German Army Group South at the big bend in the Dniepr River. November and early December of that year brought a slowdown as the earth turned to quagmire, stopping any major Russian advances. With the full onset of winter, however, the advantage went to the Soviets. With the earth now frozen rock hard Russian tanks and troops could advance. And advance they did! The key to their advance initially was the city of Kirovograd located nearly 100 miles to the west of the Dniepr bend. Both the 1st and 2nd Ukranian Fronts attacked from above and below the city in an effort to encircle a good portion of the German Army Group. General Bayerlein's masterful exit from Kirovograd to the north was a masterful stroke that allowed his 3rd Panzer Division freedom of action. The vanguard of the Soviet attack from the south was the proud 67th Tank Brigade of the Guards Fifth Tank Army. Blasting past Kirovograd it moved to Malaya Viska, headquarters of the 47th Panzer Corps. General Vormann, its commander was barely able to escape in time as T-34s entered the village spraying cannon and machine gun fire in all directions. Continuing the attack, the Russian tank brigade next attacked the nearby airfield, which was home to Lt. Colonel Hans-Ulrich Rudel and his famed "tank-busting" staffel (squadron). Fortunately Rudel and his pilots were in the air when the Russians attacked. Upon returning, however, to the base, the cannon armed Stukas dove upon the Russian tanks with a vengeance. One T-34 after another exploded under the relentlessly diving Stukas. Then to add to the chaos, tanks of the 47th Panzer Corps joined in the battle, leaving the entire once proud 67th Tank Brigade shattered beyond belief. Though a pyhrric victory at best, it brought some comfort to the weary Germans to see the tables turned on their pursuers. AAR: (Ok, this is a test scenario for Wild Bill. Its pretty cool but not released yet. At least not when this AAR was started.)
Well, I played this one three times. I like it. My first 2 games, I played through and thought there was a glitch because the mines damaged none of the Russian tanks. Then I decided on the third game to check the preferences. It helps to have the mine feature turned on. <G> So needless to say, the first 2 games I was basically overrun. The planes did damage to the Russian tanks, but only a few were destroyed. They did definitely take the pressure off. But with the mines off, I found myself overrun before I even got the men calmed down and thinking clear. But the third game was a different story, having played the first 2 games, I knew what to expect and where. I immediately called down an air strike where I knew the Russians would appear in the woods just on the other side of the runway. I moved the panzerchrezk units forward. The northern one behind the 50mm ATG guarding the runway. I moved the southern one into the series of buildings next to the road and in front of the wire. I had both these units dig in and wait. This paid off when the tanks finally did appear. The northern one took out about 3 tanks before he was eliminated, and the southern one killed one and tracked another (SU 152). I figured that if I could at least immobilize most of the AFVs, then my men could hold of the infantry at least for a while. I learned in the first 2 games that the ATG guarding the runway is a vital piece. Doomed to be destroyed, but very valuable none the less. The more AFVs this unit can take out, the better off you will be the remainder of the game. The strategy in this one was to try to gradually absorb the Russians as my units fall back.
Right off the bat the ATG at the runway started taking a heavy toll on the AFVs. The ones that made it through its fire soon ran into the mines. But still some made it through and by the second turn they rendered the ATG useless. The MG stationed adjacent, did a decent job of pinning the off loading infantry but soon fell to the same marauding AFVs. My infantry in the woods west of the runway managed to take out 2 more AFVs at point blank range before retreating under very heavy fire. The bunker took out about 4 Russian squads before it too was knocked out by a tank. The Northern defense was almost non existent at this point. I was trying desperately to rally the infantry and try to get them in an effective position again. The Russians were now pushing through the northern defense. But it cost them dearly. The JU-87s started their attack soon after. They had a much better effect than in the first 2 games. Lots of smoking tanks now. The mines continued to surprise the tank drivers. They even destroyed a few of them instead of tracking them. My tanks started to arrive and I moved the stugs up to the second line of defense, which was forming on the west bank of the frozen pond. Here I would try to hold off the Russian tanks using the 4 pzkwIV, and all 4 of the assault guns. I wanted to try and stall the Russian movement in this spot so the aircraft could come in on them here. As soon as I moved the pzkwIVs into position, I lost one. But the leader of that squadron took out 2 enemy tanks. They did a good job holding the Russians in this area. The planes came swooping down making many Russian widows.
The following turns, the Russians were basically stalled. Only infantry moved in the north and were cut down by the watching panzers. In a foolhardy attempt on my part, to quickly take the remaining victory hex at the NW end of the runway, I loose one of my remaining pzkw IV trying to make a mad dash to recover the hex. He falls prey to 3 Russian squads before he even has a chance to react. The only other unit I have within reach of the squad is another pzkw IV. Knowing the Russians have those units guarding their only victory hex, I opt to let them keep it. (I regret this after the scoring) The Russians send 2 tanks in a desperate attempt to grab another victory hex in the southwest area of the map. My squads in this area track one of them and kill the other. That was pretty much the last attack. 1 turn left and the game is over. My MG unit that is helping guard the SW victory hex gets an opportunity to fire on a SPAA unit and destroys it before the game is over. Final result... Draw
 |
|
|